Join the JOANN community and explore how-to projects or create your own. Get exclusive coupons and deals, and manage your shopping list on the go.
What are you waiting for?
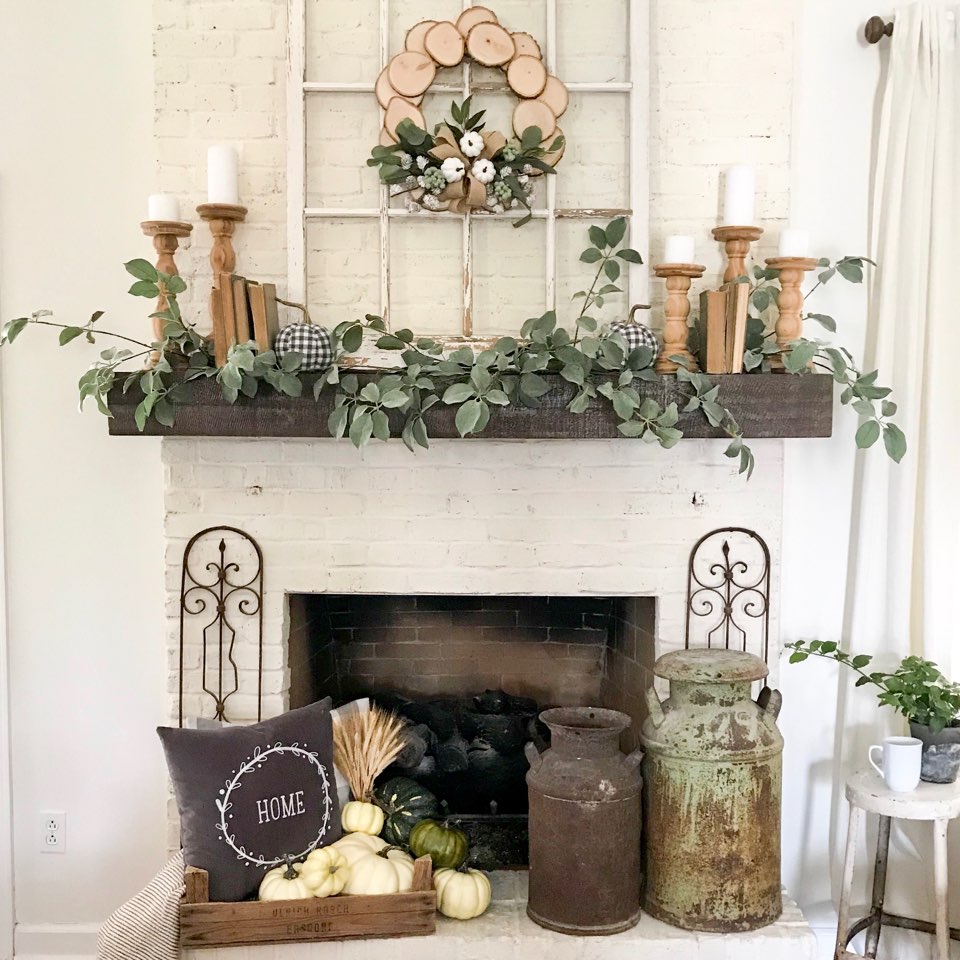
Fall Wood Slice Wreath
Looking to make a wreath to match your rustic decor? Check out how I made this super easy wood slice wreath for fall!
Want to see more great how-to videos? Try the new JOANN app.
Instructions
-
Step 1
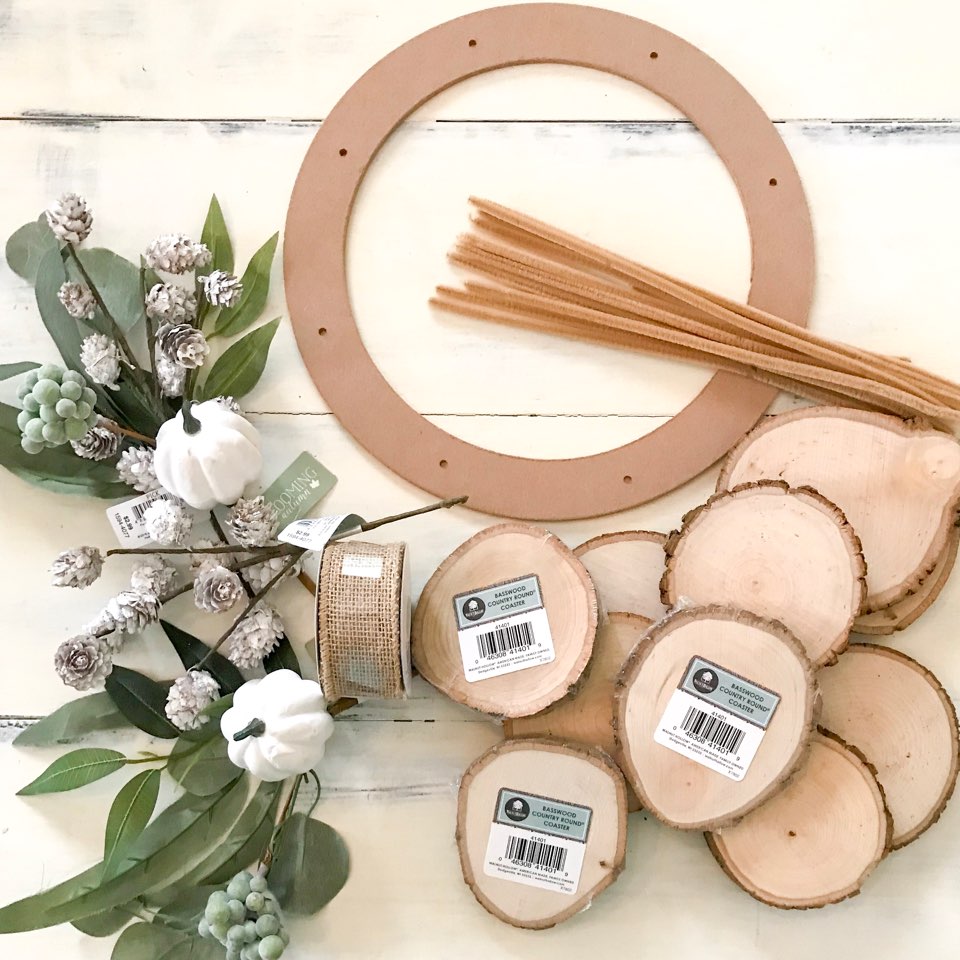 Gather your materials. I used a total of 15 wood slices, but you could use as many as you like depending on your desired size.
 -
Step 2
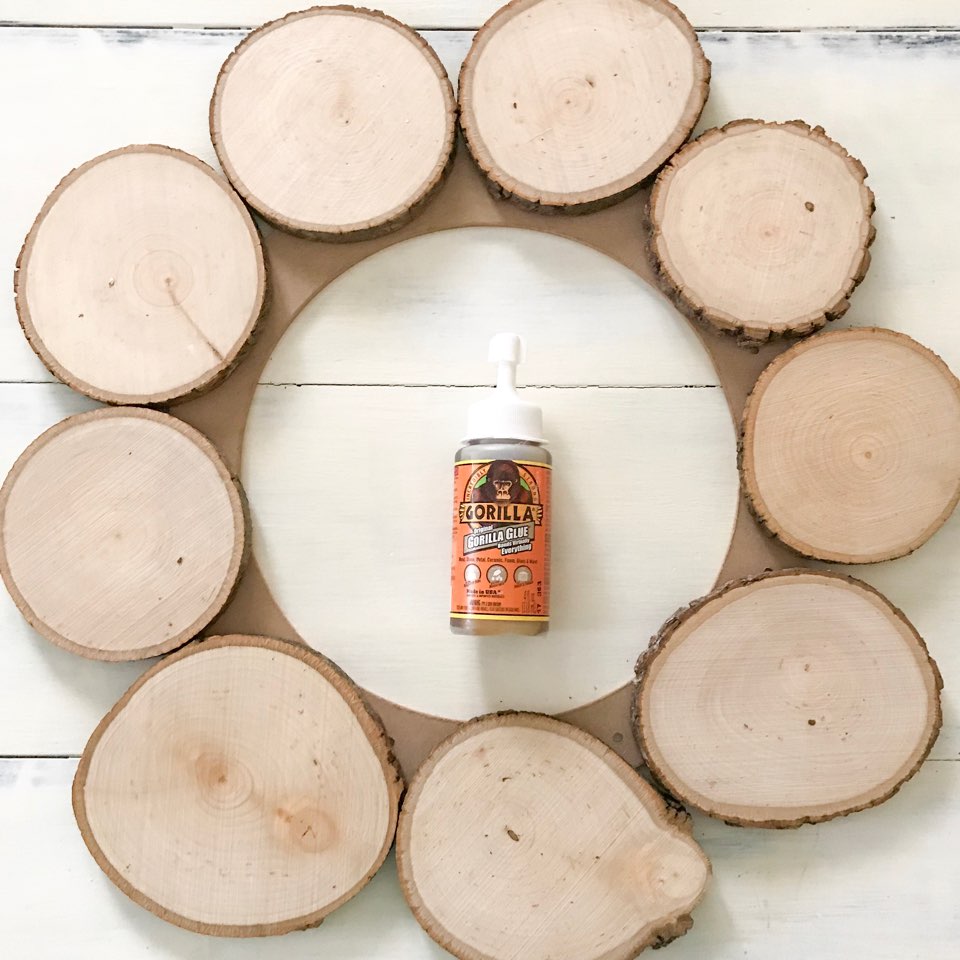 Place your wood slices around your craft wreath. Make sure you get the pieces in place where you want them before you glue. Make sure you are covering your craft wreath. Glue each wood slice with Gorilla Glue. It only takes a little because it expands. Do not use too much.
 -
Step 3
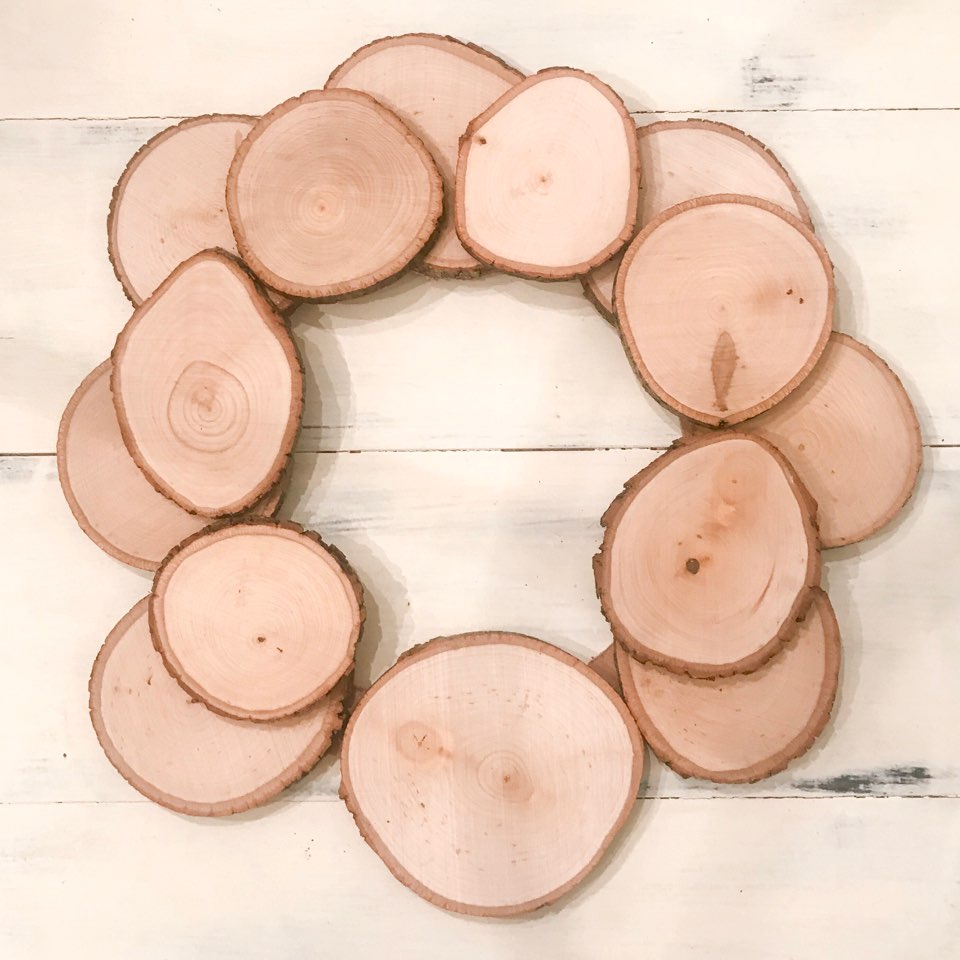 Now, place wood slices on your second layer in between each wood slice on layer one and glue. Allow both layers to dry about 30 minutes.
 -
Step 4
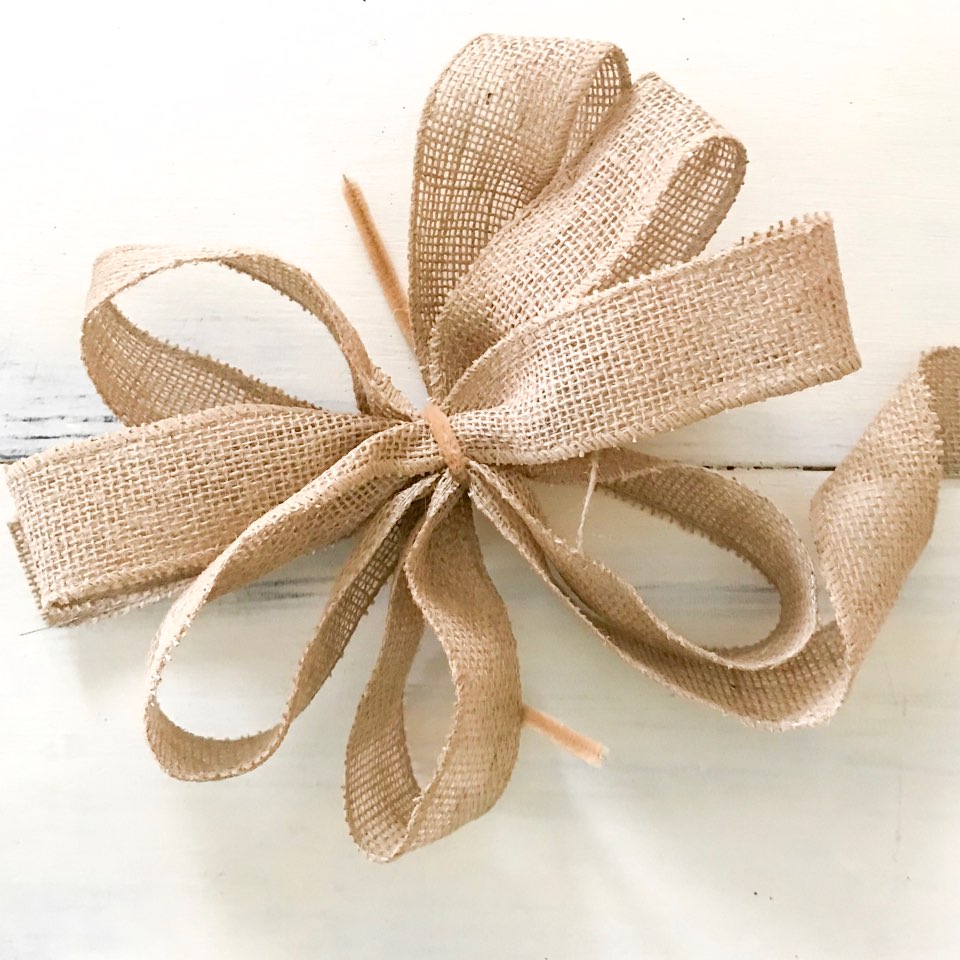 While your wreath is drying you can make your bow. I made 5 loops and tied the middle with a pipe cleaner. Cut the remaining ribbon off.
 -
Step 5
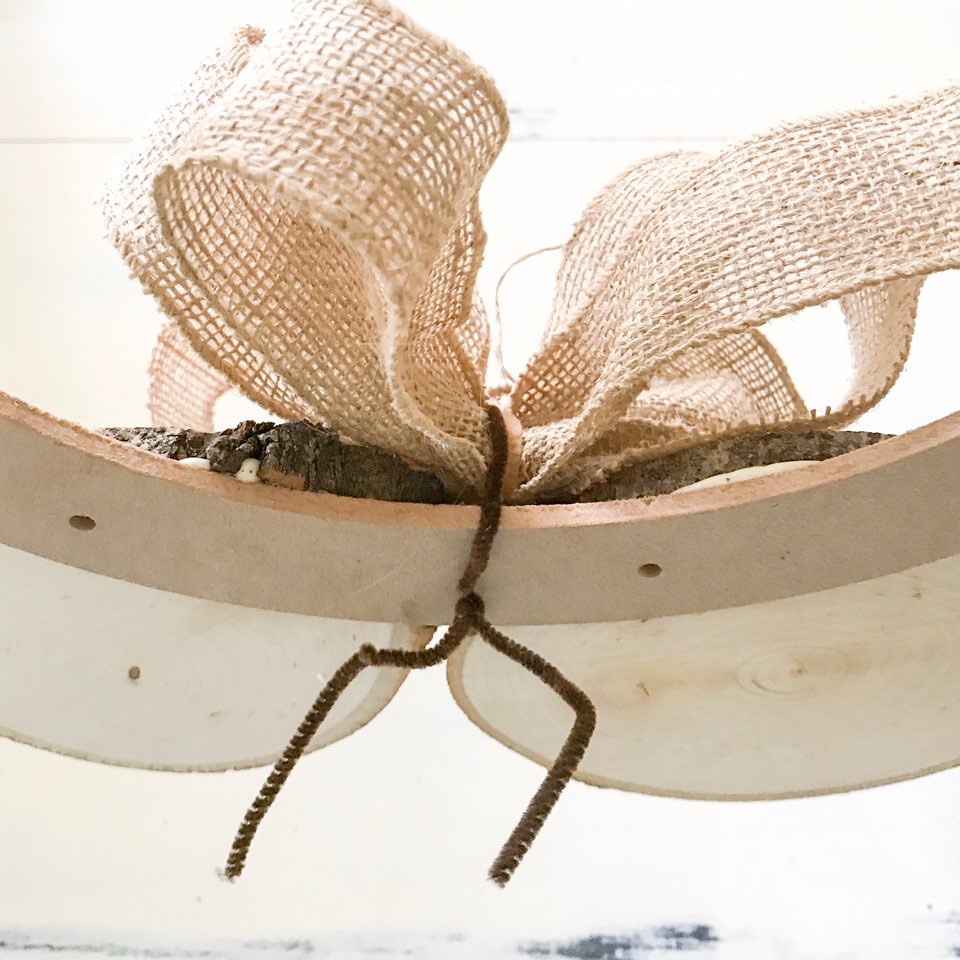 Tie your bow to the wood craft wreath using a pipe cleaner. Pull tight and twist.
 -
Step 6
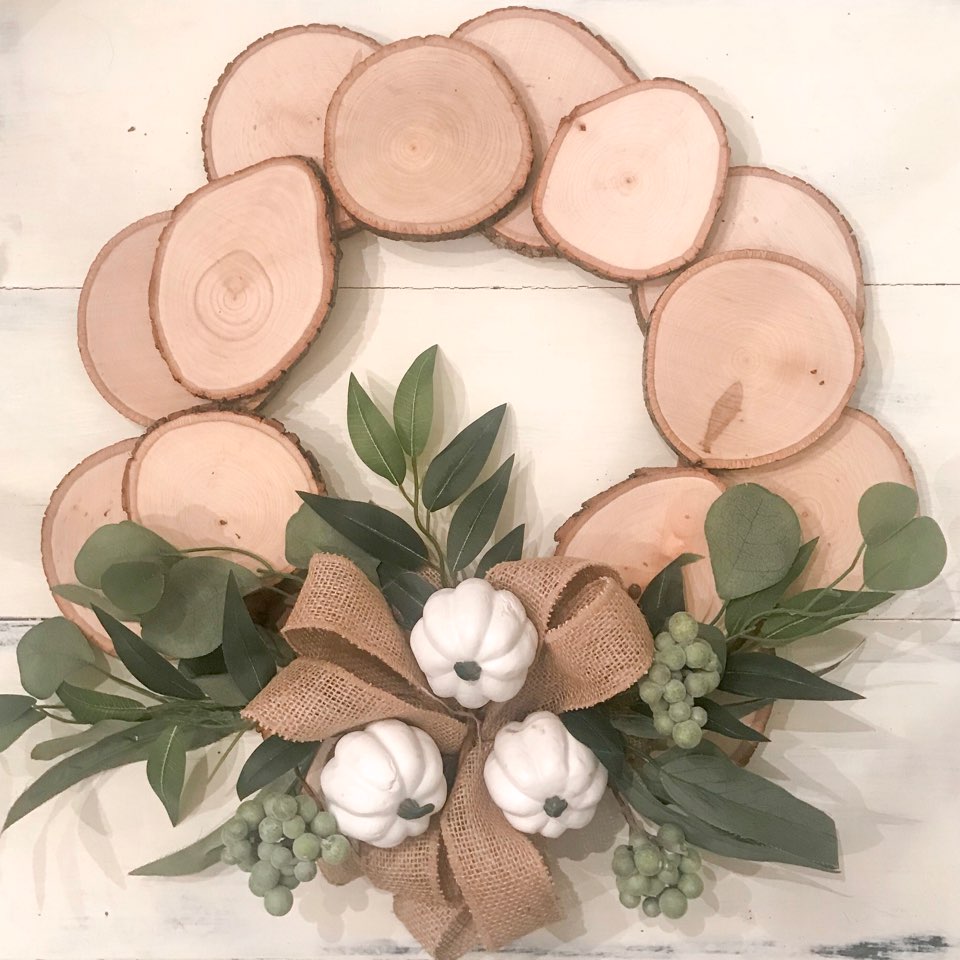 Stick your desired fall stems on each side into the middle of the bow having the pipe cleaner securing the stem tightly. You may want to add another pipe cleaner to the stems if they feel loose.
 -
Step 7
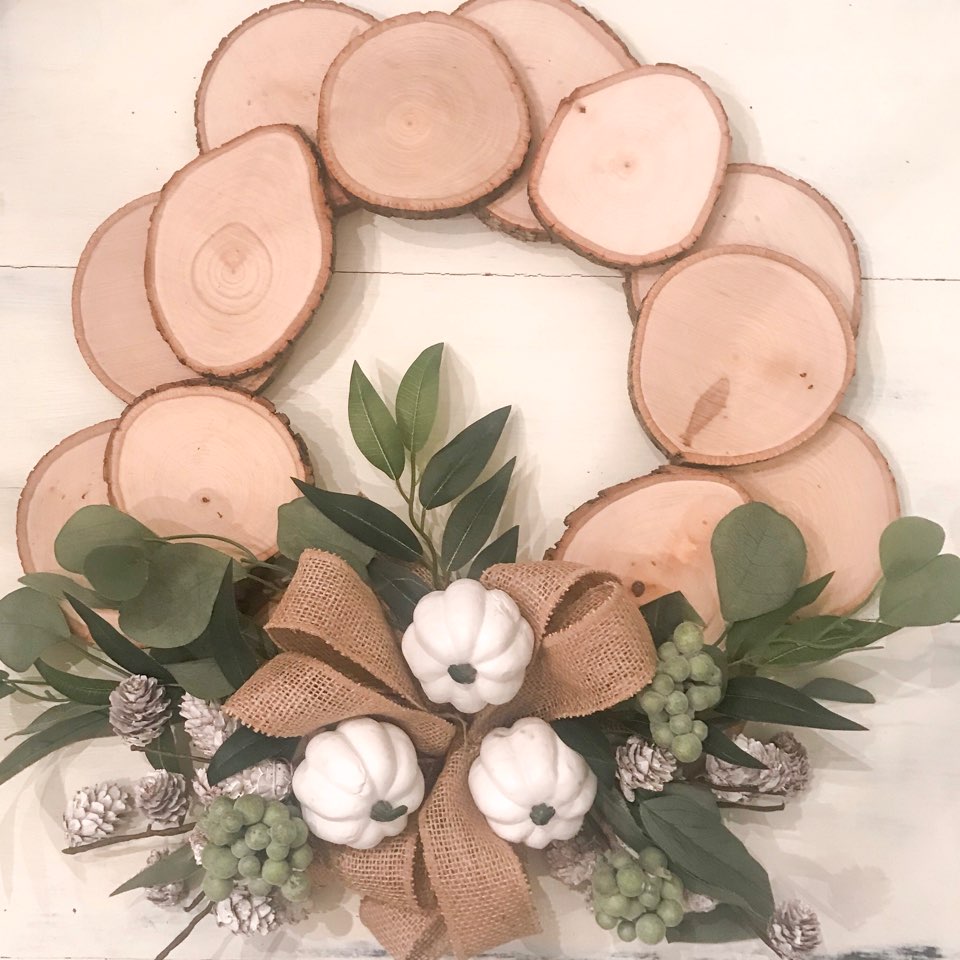 Continue adding your fall stems until you get your desired look.
 -
Step 8
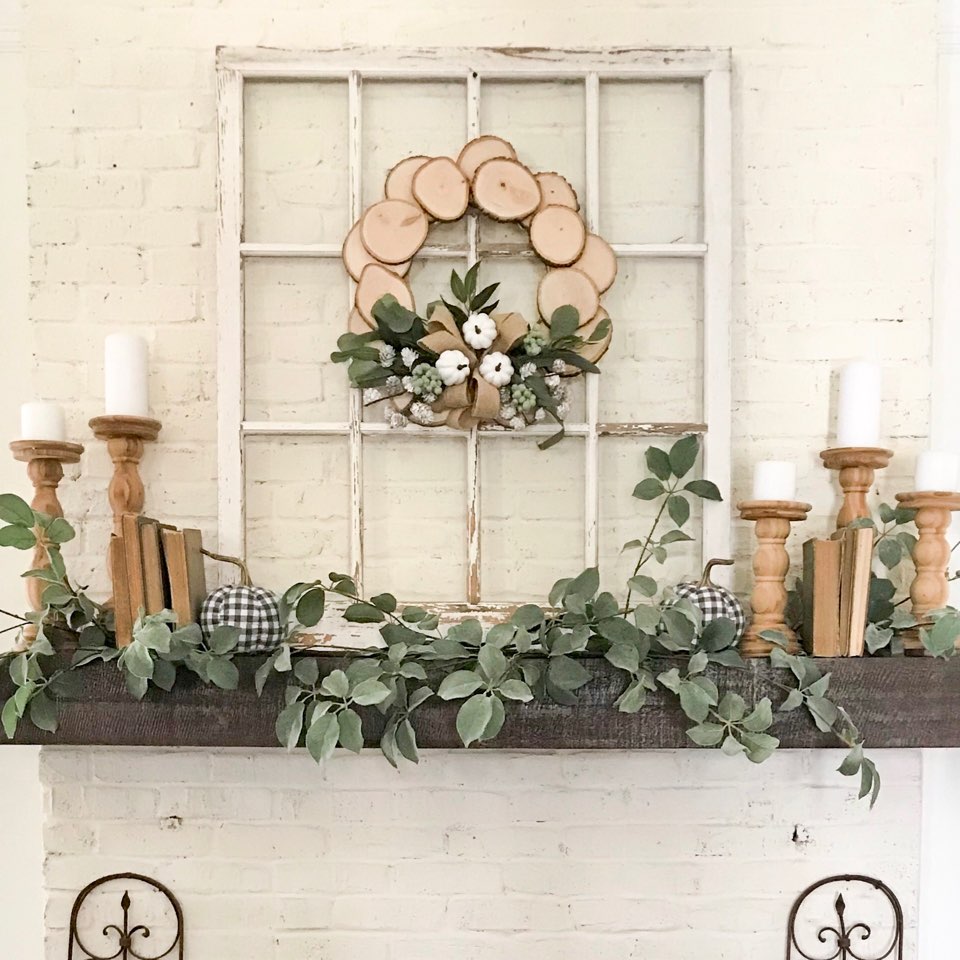 All finished! Add your wood slice wreath to your fireplace or a front door, and it will for sure add a beautiful rustic touch to your fall decor!
- Supplies
- Basswood Country Round Coasters from JOANN
- Gorilla Glue
- 3 Leaf and Pumpkin Picks from JOANN
- 2 White Pine Cone Picks from JOANN
- Burlap Ribbon with Wire
- Wood Craft Wreath
Get Inspired with JOANN