Join the JOANN community and explore how-to projects or create your own. Get exclusive coupons and deals, and manage your shopping list on the go.
What are you waiting for?
DIY Nail Polish Ornaments
Make these beautiful marbled nail polish ornaments with your kids for Christmas. The best part is that you can choose any color you want!

Want to see more great how-to videos? Try the new JOANN app.
Instructions
-
Step 1
 Gather your supplies and lay down protective coverings on your surface because this can be messy.
 -
Step 2
 Remove the ornament top and squirt 2-3 drops of the white craft paint into the ornament and add a splash of water. Next, shake the ornament until the white paint coats the inside of the ornament. This will allow the paint on the outside of the ornament to show up better.
 -
Step 3
 Prepare a disposable piece of disposable Tupperware full of room temperature water. Next, drizzle in your two colors of nail polish. We used a light blue and dark blue(new polish is critical, old won’t work) Use your stir stick to gently swirl the two colors as the paint will float on the surface of the water.
 -
Step 4
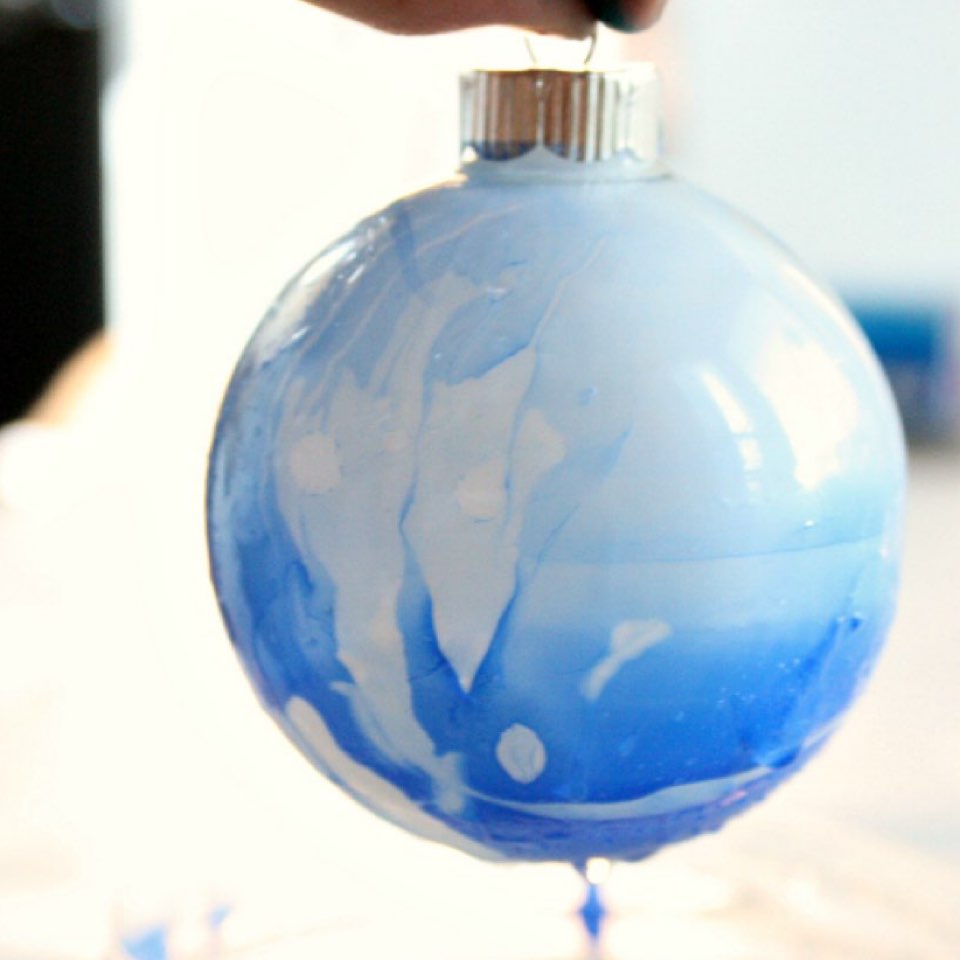
 Dip your ornament fully under the water (if you have rubber gloves you will want to wear them at this point). Bring it up and see the paint stick to the ornament. See if you like the look or dip it again to add more nail polish to the ornament.
 -
Step 5
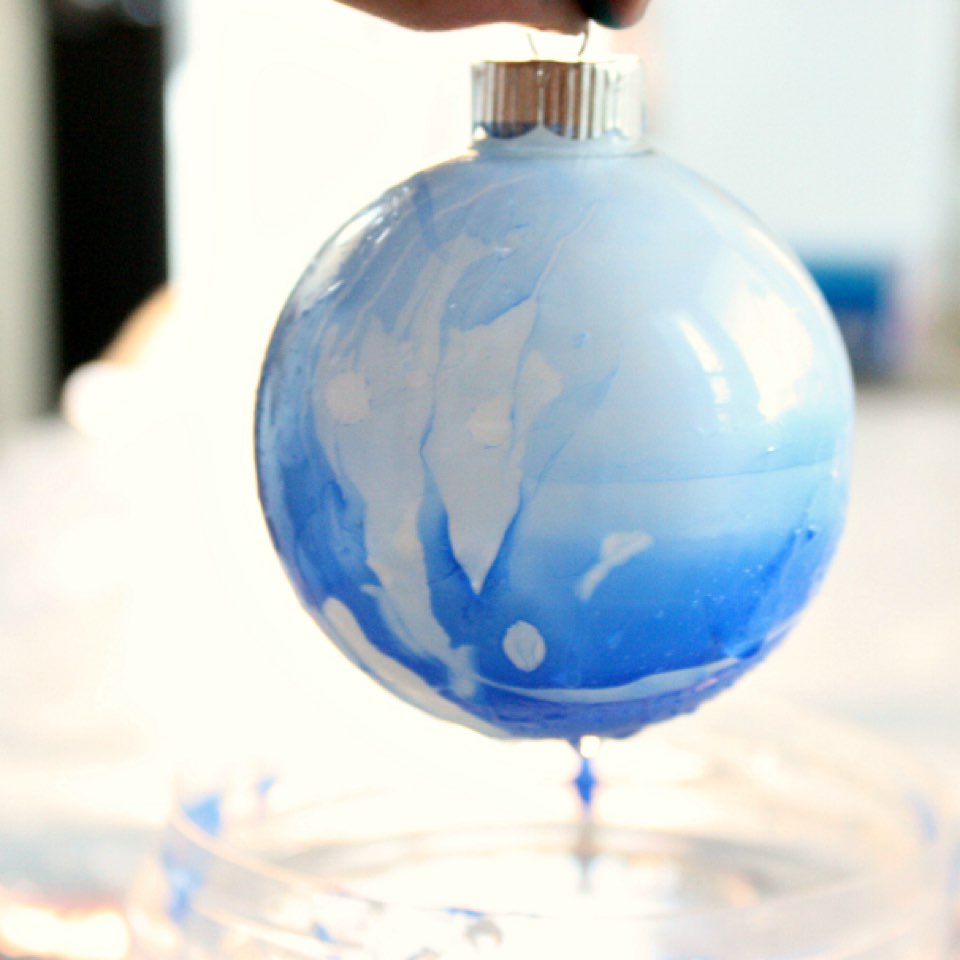 Dip once more for more color!
 -
Step 6
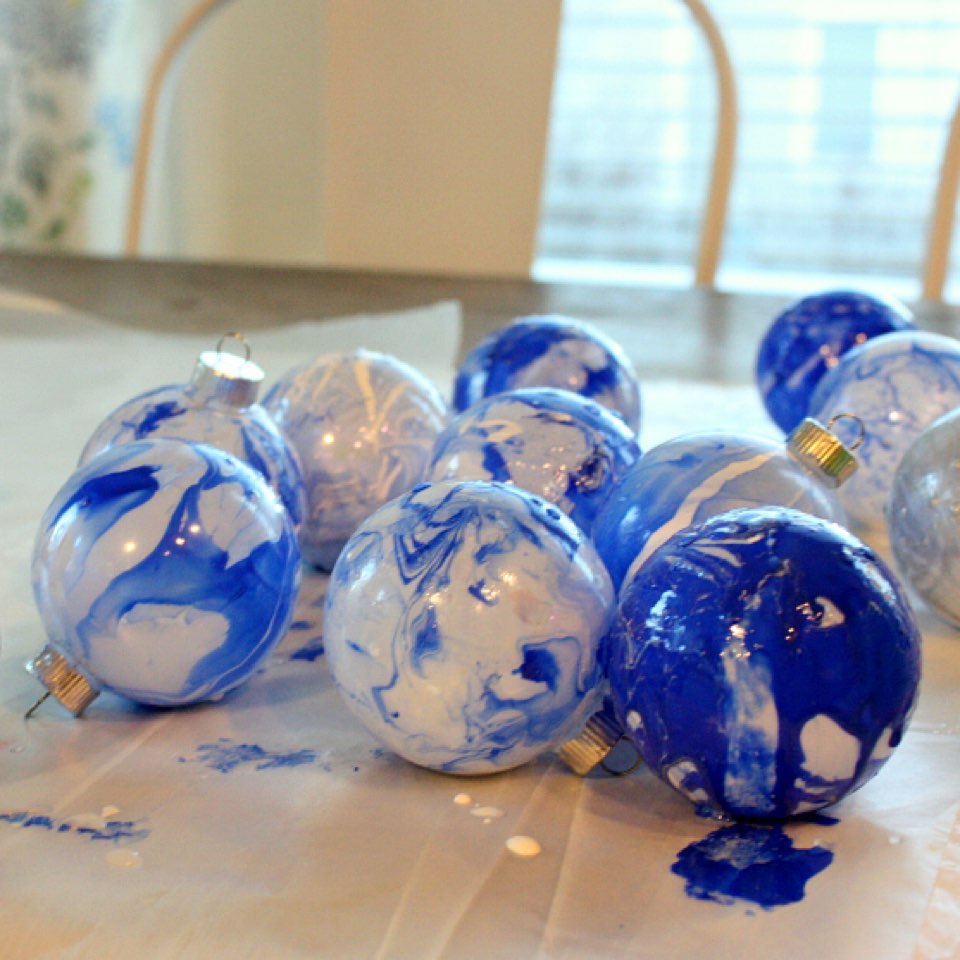 Set your ornament on wax paper and allow it to dry overnight. Attach hooks and hang them on your tree to enjoy!
- Supplies
- clear ornaments
- two colors of nail polish
- white craft paint
- stir stick
- disposable bowl
- room temperature water
- wax paper
- rubber gloves
Get Inspired with JOANN